Browse our online store for our full range of insulation, Thermax B®, ventilation and weatherproofing products, brought to you at competitive prices. You’ll find options tailored to individuals and trade professionals.
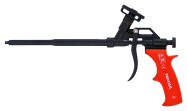
Foam Applicator S1 Pro Gun
Instructions for Use
Plan ahead for safety and best results. Prevent eye and skin contact.Polyurethane foam sealant is extremely sticky. Wear protective gloves and eyewear.Shake can vigorously for 1 minute before dispensing product and between uses. Hold gun in the upright position and slowly screw on to the applicator gun. Do not over-tighten. Do not force the can thread onto the applicator gun-this could damage the cans plastic threads resulting in a poor seal between the can and the gun adapter.Turn flow control screw on the back of the applicator gun counter-clockwise, about two or three turns to an open position. Press trigger to fill the applicator gun with foam. Stop once there is a steady flow of foam dispensing from the nozzle. Use the flow control screw on the applicator gun to adjust foam bead size.Turn the screw clockwise to reduce the flow and/or obtain a thinner bead size.Turn counter-clockwise to increase the flow and/or obtain a thicker bead size.
Note: Do not completely unscrew the flow control screw. Doing so would release foam from the control port.
Storage
Turn the control screw on the back of the applicator gun clockwise until fully closed for storage. In the closed position, the trigger will be locked and foam will not dispense.Store can upright with foam applicator gun attached. Clean nozzle end / tip with Applicator Gun Cleaner. Do not force or cause any damage to the nozzle end / tips.To re-use make sure the end / tip of the gun nozzle is clean. Do not use any object that may cause damage to the rod inside the tip. Failure to clean the tip could result in foam not dispensing or dispensing of inconsistent foam bead.
Changing Cans
When ready to change can, shake the new can well.Unscrew empty can. Use Cleaner with enclosed spray adapter to clean uncured foam from the gun/can adapter assembly.Remove excess cleaner from gun/can adapter assembly Refer to the product instructions on the can. Clean the valve of the foam can if the can is not empty and meant to be used again.IMMEDIATELY screw on the new can of foam to avoid the foam from curing in the adapter.IMMEDIATELY press the trigger to PUSH foam THROUGH gun. This will remove anyair bubbles trapped inside gun chamber during can change over.If the gun/foam is not being used refer to storage instructions.
Important Notes
NEVER store the applicator gun with a can of Gun Cleaner attached to the gun. NEVER leave a foam applicator gun without a can of foam attached, unless it has been THOROUGHLY cleaned with Gun Cleaner. NEVER use water to clean the gun. SPECIAL NOTE: Once the foam has hardened in the gun, solvent will not dissolve the foam.
Precautions
Follow all instructions on the product label for safe use and handling.


